Folding campers have one main enemy, above all others and that is moisture. It attacks the outer canvas, the soft furnishings and, even, the structure of the trailer, itself.
Never, under any circumstances leave your folding camper stored, when it has been folded away whilst damp. Opinion varies as to how long is safe to do so, but a conservative estimate is around 48 hours, before mould will begin to form in the airless confines of the folds of canvas.
Obviously, the best way to avoid this is to fold it away on a completely dry day, when the canvas has been thoroughly aired, but, regrettably, this is not always possible, so we need to look at the best ways around this, especially if we are storing the camper away for the Winter.
One of the big features of the Dandy trailer tents is their ability to be folded away wet. This is not a luxury shared by the vast majority of trailer tents and folding campers. The later Pennine models now utilise synthetic canvases, made by Isabella, which significantly reduce the problem, but we still need to be aware of the key do’s and dont’s, when packing our camper away.
The first, and most important thing is; don’t be afraid to pack your camper away wet. Just be aware that you can’t leave it that way for too long. Failure to observe this key rule will result in mould and / or mildew, and, in the longer term, will cause poles etc to rust, causing yet more staining to the canvas, which will, itself, eventually erode away.
Even if your camper was packed away on a lovely sunny day, there is no absolute guarantee it will be damp free, especially if previous days have been less than ideal. Damp can accumulate in the folds of the camper, inside window flaps, and in the interior of the camper, especially if there has been a couple of days of wet weather prior to leaving the camp site. Even the sunniest of days will not always be damp free. Awnings in particular are in constant contact with the ground, and any moisture will be trapped underneath their lower flaps, which need to be dried out thoroughly, before storing. When eliminating damp, we need to operate a zero tolerance policy. Remember; a lot of damp = a lot of damage. A little damp = a little damage. Personally, I don’t want any damage, whatsoever, to my beloved camper.
Packing Away On Site
It goes without saying that we should always try and pack away when the canvas is bone dry, but, in the real world, that’s not always possible, and many of us will have experienced the joys of packing away in the pouring rain.
If it is raining, or had been immediately prior to packing the camper away, then shake off as much rain as possible from the canvas, and wipe off with a clean, dry towel or cloth, before folding away. It is very important not to use one that has been washed in detergent, as this will damage the waterproofing of the canvas, and, once this has happened, it is almost impossible to achieve full waterproofing again.
This is also worthy of remembering when thinking of cleaning your camper canvas. Only use purpose made products, as the wrong detergent can do way more harm than good.
As soon as possible, when you arrive home, open the unit out to allow it to dry. If you don’t have enough space on your own drive, get it to somewhere ASAP and open it out there, as this is extremely important. Allow the air to circulate throughout the camper, by leaving all vents and windows open, as well as the door and side panel, if applicable. Do not attach the canvas to the body of the trailer, so that air can circulate here, also. If there is any damp, whatsoever, internally, this should be dealt with at the same time. Bedding, bed pods, mattresses etc, may all dry out adequately with proper ventilation, but, if this is not possible, then they will need to be removed. More Information on that below. At this stage, a small heater will help the camper to dry out, but be wary of leaving any such device on for too long, especially if unattended.
When everything in your camper is properly aired, then, and only then, should you pack it away again. Whilst I appreciate that some people do not have the space on their own drive to do this, it is always better to leave the camper set up, when it’s pouring with rain, as this allows the air to circulate, even though it is exposed directly to the rain. This is better than leaving it packed away, where the non ventilated atmosphere will quickly facilitate degeneration. In the past, I have had to leave mine set up, for almost a week, waiting for a day dry enough to finally air it properly, prior to packing away.
Long Term / Winter Storage
This section is aimed, primarily, at those looking to store their camper away for an extended period, most commonly, over the Winter. Some of these suggestions may also be appropriate for short term storage as well, whilst others may not be relevant (or, even, possible) for many, at any time of the year. As always, our aim is to consider as many options as possible, so we can make an informed choice as to the best ones for us.
- The first, and golden, rule, as discussed above, is make sure all aspects of your camper, both inside and out, are fully dried and aired, prior to storage.
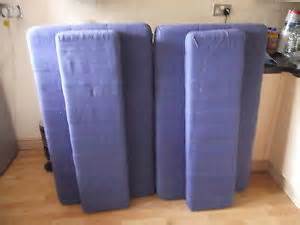
- You may wish to remove any electronics and soft furnishings, prior to storing. The extent to which you do this will be largely dependent on where the camper is to be stored. Personally, I store mine in a nice, dry garage, so I tend to leave as much in situ as possible, though I do tend to remove all electrical equipment, such as TV, microwave etc. If you are storing your camper outside, it is probably prudent to remove as many of the soft furnishings as you have space for. This will include bed pods, roof liner, mattresses, curtains and seat cushions. All of these simply unclip / lift out, so not a big job, if you have the space to store them (watch out for mice, though, if storing things in a loft or garage).
- Fresh and waste water containers should also be removed, and stored with their caps off. This ensures they are well ventilated, and prevents any residual water from stagnating. Obviously, this is not something you want to do inside your unit, as the evaporating water will increase the internal humidity.
- All water systems need to be drained down, both to prevent stagnation, and to eliminate the risk of pipe damage, through freezing. Open all taps in the camper fresh water system, to allow them to drain properly. Run the on board water pump for a few moments, to remove any residual water. Most pumps can be run dry for short periods, without causing damage, though it may be prudent to check this in your manual, if at all possible. If there is an external submersible pump, shake it gently, then wipe it with a clean dry cloth, prior to storing. If there is a water heater fitted, then drain that too, by opening the valve adjacent to the water heater. A really useful tip on this front is to, ideally, open all taps and valves, prior to leaving your last camp of the year, as the vibrations of the journey home will help to shake out the last few drops of water in the system. If this isn’t an option, or you forget to do so, you can always hitch up at home, and go for a quick spin round the block.
- Vacuum and clean the interior thoroughly, making sure that you only use specialist caravan products, where at all possible, as standard cleaning products can do harm to the interior surfaces and seals, in the same way as detergents can damage the exterior and water proofing of the canvas. Clear out all cupboards, paying particular attention to foodstuffs, which can attract in unwanted visitors, thereby causing further damage to the interior. Once cleared, leave each cupboard door slightly open, to encourage air circulation. A soft clothes peg attached to the door, will prevent it shutting by accident. Empty and clean the fridge, and, again, make sure the door is left slightly ajar. Most fridges will have a catch or button to hold the door in this position, thereby facilitating ventilation and reducing the risk of mould. Finally, having cleaned the kitchen area, make sure any damp items, such as dish cloths and sponges are removed, as these can really make a mess of your washing up bowl, if not removed prior to storage. (Trust me; I know from experience)!
- Although not essential, some users like to further protect hinges, seals etc by giving them a coat of WD40 or similar to help reduce rust or other wear.
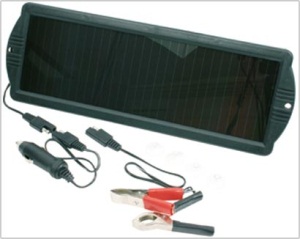
A Solar Powered Trickle Charger Will Keep A Leisure Battery Topped Up, Whilst In Storage (As Long As Light Conditions Allow)
- Caravan users may have the option of keeping a mains supply connected whilst in storage, in order to keep the leisure battery charged, and, maybe, even run a small heater, to help keep the unit dry and frost free. This isn’t really an option with a folding camper, as, even a very low spec. heater would not be wise in such a tight environment. Our primary area of concern, therefore, is the leisure battery, which can suffer noticeably. A Leisure battery should never be allowed to discharge significantly. If it is allowed to discharge by more than 50%, it in unlikely to ever achieve 100% charge ever again, and, once fully discharged, its ability to recharge is significantly compromised, and it will probably need to be replaced. The battery should be disconnected from all 12v appliances, and, if possible, isolated, using the isolation switch on the control panel. You should bear in mind, though, that even a disconnected battery will still discharge slowly, over time. Ideally, if possible, the battery should be removed, and stored in the house, where it can be recharged periodically (at least about every two months is recommended). The battery terminals should be carefully cleaned, and smeared with petroleum jelly, in order to protect them.
- As with the electrical system, the gas system will require prepping for storage as well. The valve on the top of the gas cylinders should be fully closed, and, ideally, the gas regulators disconnected (assuming they are the clip on type). Make sure end caps are placed on any open pipes etc. If you are storing your camper anywhere other than at home, then you will need to bear in mind that many storage facilities will not allow the long term storage of gas bottles, due to the safety issues associated with them, in the case of fire etc. My own is stored in a council garage, about a mile from my house, and this is a stipulation of my rental agreement. Just be aware though, if you do remove your gas bottle(s) for storage, they should be stored in an open space, which is reasonably secure, and not too close to drains, cellars etc, as lpg is heavier than air. Also, common sense dictates that they should be stored well away from combustible or corrosive materials.
- Not everyone will have a toilet in their camper, but, if you do, it will need preparing for storage and, like all other water systems, it will require draining and cleaning. Remove the waste tank, empty it, and give it a good clean (if this was not done prior to leaving your last camp site). The top water tank will also need to be drained. Most Thetford and similar toilets have a special tube for doing this. Alternatively, flush as much water as possible into the lower waste tank (prior to cleaning it, of course). At this point, it is worthwhile leaving the valve slightly open, to prevent it sticking shut in storage.
Having sorted the interior of the camper, and ensured everything is correctly drained and aired, we can turn our attention to the exterior of the camper:
- The first thing we need to do is to give the camper a thorough clean. This will not only clean the camper, ready for storage, but will also help to prevent any marks from becoming worse, and will give you the opportunity of checking the camper over, for any signs of damage, or potential issues that might need addressing / repairing. Winter is the preferable time to have this done, when repair companies are less busy, and more open to negotiations on price.
- Once again, they key thing to remember here is only to use proprietary cleaning products, as anything too ‘general’ can seriously damage the integrity of the exterior. Areas of black or green mould should be cleaner particularly well, as they have a tendency to get worse, if left unattended, and this can lead to permanent staining.
- For many, the camping season will end in September, and begin, again, around Easter time, however, for the hardened campers among us, camping is a year round affair. If this is you, then you may need to consider the extra attention a camper will need if it is being used in the Winter. The most notable requirement will be to ensure that any salt and other deposits are removed from the underside of the camper, as this can rapidly accelerate rusting of the components there. The Al Ko chassis is pretty robust, but there are plenty of vulnerable parts under there that will require protection from these contaminants, and a good hose down is always worthwhile.
Having cleaned the camper, it is ready to be placed in storage (even if that is just on your own driveway). There are a few things to bear in mind, when doing so:
- Campers are not designed to sit still for extended periods of time, and we need to make allowances for this, during prolonged storage. Tyres, in particular, do not like to be left in the same position for too long. If at all possible, they should be rotated every couple of months or so, to evenly distribute pressure. Of course, this is an ideal, and will not always be convenient to do so. Some people choose to use Winter wheels, which are, basically, metal stands, which replace the wheels, over Winter. Although this will make a camper more difficult to steal, I’ve never been a huge fan of these, as it seems an unnecessary expense and inconvenience, when compared to the alternative, described above, of just moving the camper a few inches forward or back, every couple of months.
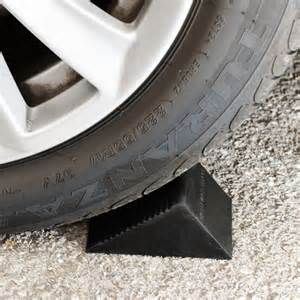
- As with most caravans, trailers, etc, the brakes can have a tendency to stick on, if left engaged for long periods of time. It’s better, therefore, to leave the hand brake off, if the camper is not expected to move over the Winter period. One way to avoid excess movement is to place chocs under the wheels, whilst, also, lowering the corner steadies. This just gives that added bit of security, as well, as the corner steadies prevent the opportunist thief from from moving the camper. Not the most comprehensive security device, as it can be bypassed with a wheel brace, but every little helps, and it will prevent the camper from moving of its own accord.
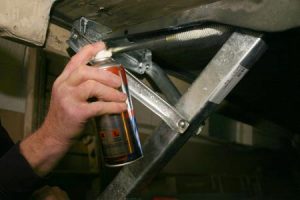
- Talking of corner steadies; this would be a good time to grease them up, in order to avoid seizing up, especially as they are in the down position.
- Even with the corner steadies down, it is prudent to fit a wheel clamp, or similar and a hitch lock will also act as a further deterrent. These are wise precautions, even if the camper is to be stored indoors.
- Electrical connections should also be protected from the elements, particularly if being stored out in the open. Connectors should be protected with a water repellent, such as WD40, and, ideally, covered with some form of hitch cover.
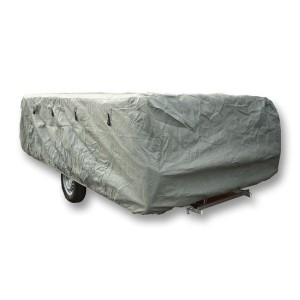
- When all the preparation has been done, you are ready to store your camper until its next excursion. Wherever you chose to store your unit, you are wise to ensure it is properly covered, to protect from the elements, or, if stored indoors, to keep out airborne dust and dirt, and, in larger storage facilities, the mess that inevitably results when birds are perching overhead. All campers come with some form of transit cover, and most will have been water proof when they left the factory, but these will break down over time, and water ingress will, eventually become an issue. Whilst they will be more than adequate for internal storage, it is worth the £150 or so investment in a proper, full length, winter storage cover to protect the camper as well as possible from the elements. There is no substitute for storing a camper indoors during the winter, but, where this is not practical, or prohibitively expensive, a proper cover will go a long way towards keeping your pride and joy as dry and safe as possible.
- For those campers stored outside, it is important to avoid standing water on the cover, wherever possible. Whilst a good cover will withstand the worst of rain showers, standing water will, eventually, degrade the integrity of the cover, and, at best, will cause staining that may be difficult, or, even, impossible to remove. One way to reduce this risk is to store the camper at an angle, either by storing it on sloped ground, or tipping it, using the jockey wheel / corner steadies, so that the majority of the water runs off. Another popular method is to place something under the cover (a football being a popular choice) to create a curved surface, again, to deflect any rainfall.
As stated at the start, these suggestions wont all apply to everyone, but, hopefully, they will give a few ideas of the kind of things we should be thinking about when putting away our folding camper, whether for a couple of weeks, or long term Winter storage, to make sure it’s in top condition and ready to go when you take it out for your next camping trip.




Hi Alan …….I’ve just packed our Dandy Dart away …..having owned Dandy’s for over 25 years now, I’m pretty well versed in their care …..but last winter we suffered mice damage [for the first time ever] …..hopefully, I’ve overcome this by placing an aersosol lid over the sink drainer-pipe hole and blocking it ……I dunno what else I can do?? ……any other tips you may have gratefully taken on board.
best regards
Terry. .
LikeLike
Hi Terry. On thing you will never be able to physically stop is a mouse getting into the camper. If you’ve ever seen one collapse down and squeeze itself under a door, you’ll know why. Traps are not ideal, as dead mice in the camper don’t exactly do much to enhance the ambiance. There are various proprietory deterrents available on the market, but many believe mint is as good as anything. Moth balls are also popular, but their effectiveness appears to be sketchy.
I would definitely look at deterrents, rather than physical barriers. Nothing wrong with using both, but mice will always find their way in some way.
LikeLiked by 1 person
Cheers Alan ……mint & mothballs it is then …..[I’d never thought of anything like that] 😉
LikeLike
great advice for novices like myself got a kampa cover if I cant get ours in the garage
LikeLike
Hi there, some good advice.
Do you tend to put the football under the trailer tent transit cover or under the winter storage cover?
Regards
LikeLike
Thanks Jim. To be honest, I don’t think it really matters, as long as the outer surface is raised, to prevent rain pooling. I suppose that putting it under the outer cover will help to ensure the transit cover remains as taut as possible, which is important when travelling, to avoid billowing of the cover.
LikeLike
Once again I have picked up so many tips from Bluesky, bought our Sterling in May this year never been camping before, been away 9 times this year just completed a two week trip around Wales .
I have been constantly viewing this site, and learned so much
Big thank you Alan from Steve and Ann Wirral
LikeLike
Thanks Steve & Ann. Glad to hear the site has been of some use to you. Enjoy. Alan
LikeLike